


📅 更新时间:2026年5月14日 🎯 适用版本:UniApp 4.x / Vue 3 💡 适合人群:跨平台应用开发者、Web前端转移动端
1. UniApp 简介
1.1 什么是 UniApp?
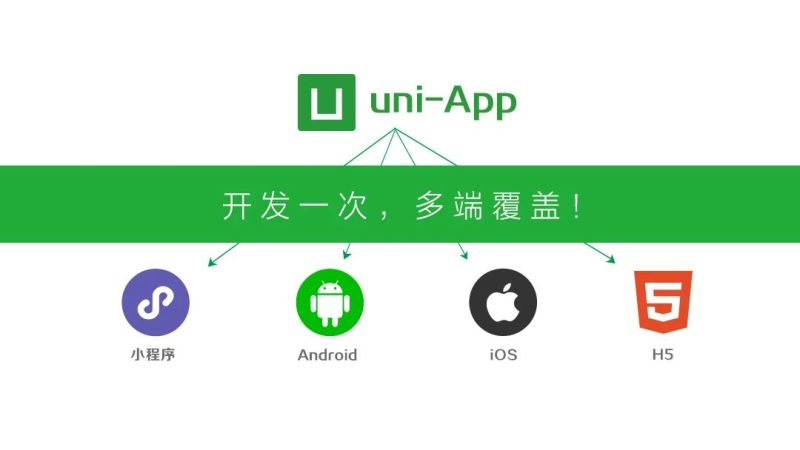
UniApp 是一个基于 Vue.js 的跨平台开发框架,一套代码可以编译到:
- iOS
- Android
- H5(移动端浏览器)
- 微信小程序
- 支付宝小程序
- 抖音小程序
- QQ 小程序
- 百度小程序
- 快应用
1.2 核心优势
| 优势 | 说明 |
|---|---|
| 一套代码多端运行 | 节省开发成本,提高效率 |
| 基于 Vue.js | 前端开发者零门槛上手 |
| 性能优秀 | 渲染性能接近原生 |
| 生态完善 | 支持丰富的插件和组件 |
| 云开发支持 | 内置云函数、数据库、存储 |
| HBuilderX IDE | 强大的可视化开发工具 |
1.3 技术架构
┌─────────────────────────────────────────────────────────┐
│                      UniApp                              │
├─────────────────────────────────────────────────────────┤
│  ┌─────────────┐  ┌─────────────┐  ┌─────────────┐     │
│  │   Vue 3     │  │   组件库    │  │   API 层    │     │
│  │   核心      │  │   uni-ui    │  │   uni API   │     │
│  └─────────────┘  └─────────────┘  └─────────────┘     │
├─────────────────────────────────────────────────────────┤
│                    UniApp 内核                            │
│  ┌──────────┐  ┌──────────┐  ┌──────────┐  ┌────────┐  │
│  │   iOS    │  │   安卓   │  │  小程序   │  │  H5   │  │
│  │   原生   │  │   原生   │  │   渲染    │  │  浏览器│  │
│  └──────────┘  └──────────┘  └──────────┘  └────────┘  │
└─────────────────────────────────────────────────────────┘
2. 核心概念
2.1 项目结构
my-uniapp/
├── pages/                  # 页面目录
│   ├── index/
│   │   └── index.vue       # 首页
│   ├── list/
│   │   └── list.vue        # 列表页
│   └── detail/
│       └── detail.vue      # 详情页
├── static/                 # 静态资源
│   ├── images/
│   └── fonts/
├── components/             # 公共组件
│   ├── my-header/
│   │   └── my-header.vue
│   └── my-list/
│       └── my-list.vue
├── utils/                  # 工具函数
│   └── request.js
├── store/                  # 状态管理
│   └── index.js
├── App.vue                 # 应用入口
├── main.js                 # Vue 入口
├── manifest.json           # 应用配置
├── pages.json              # 页面路由配置
├── uni.scss                # 全局样式变量
└── package.json           # 依赖配置
2.2 应用配置 (manifest.json)
{
  "name": "MyUniApp",
  "appid": "__UNI__XXXXXX",
  "description": "我的应用",
  "versionName": "1.0.0",
  "versionCode": "100",
  "transformPx": false,
  "app-plus": {
    "usingComponents": true,
    "nvueStyleCompiler": "uni-app",
    "compilerVersion": 3,
    "splashscreen": {
      "alwaysShowBeforeRender": true,
      "waiting": true,
      "autoclose": true,
      "delay": 0
    },
    "modules": {},
    "distribute": {
      "android": {
        "permissions": [
          "<uses-permission android:name=\"android.permission.INTERNET\"/>"
        ]
      },
      "ios": {}
    }
  },
  "quickapp": {},
  "mp-weixin": {
    "appid": "wx1234567890",
    "setting": {
      "urlCheck": false,
      "es6": true,
      "postcss": true,
      "minified": true
    },
    "usingComponents": true
  },
  "h5": {
    "title": "MyUniApp",
    "router": {
      "mode": "hash",
      "base": "./"
    }
  }
}
2.3 页面路由配置 (pages.json)
{
  "pages": [
    {
      "path": "pages/index/index",
      "style": {
        "navigationBarTitleText": "首页",
        "enablePullDownRefresh": true,
        "navigationBarBackgroundColor": "#ffffff",
        "navigationBarTextStyle": "black"
      }
    },
    {
      "path": "pages/list/list",
      "style": {
        "navigationBarTitleText": "列表",
        "disableScroll": false
      }
    }
  ],
  "globalStyle": {
    "navigationBarTextStyle": "black",
    "navigationBarTitleText": "UniApp",
    "navigationBarBackgroundColor": "#F8F8F8",
    "backgroundColor": "#F8F8F8"
  },
  "tabBar": {
    "color": "#7A7E83",
    "selectedColor": "#3cc51f",
    "borderStyle": "black",
    "backgroundColor": "#ffffff",
    "list": [
      {
        "pagePath": "pages/index/index",
        "iconPath": "static/tab-home.png",
        "selectedIconPath": "static/tab-home-active.png",
        "text": "首页"
      },
      {
        "pagePath": "pages/list/list",
        "iconPath": "static/tab-list.png",
        "selectedIconPath": "static/tab-list-active.png",
        "text": "列表"
      }
    ]
  }
}
3. 环境搭建
3.1 开发工具
推荐使用 HBuilderX
| 工具 | 说明 | 下载地址 |
|---|---|---|
| HBuilderX | 官方 IDE,功能强大 | https://www.dcloud.io/hbuilderx.html |
| VS Code + 插件 | 轻量级 + uni-app 插件 | VS Code Marketplace 搜索 uni |
3.2 HBuilderX 使用
1. 下载并安装 HBuilderX
2. 安装 uni-app 语法提示插件(内置)
3. 创建或导入项目
4. 运行到浏览器/小程序模拟器/真机
3.3 命令行项目创建
# 确保已安装 Node.js (>= 16)
node -v
# 使用 vue-cli 创建项目
npx degit dcloudio/uni-preset-vue#vite my-uniapp
# 进入项目目录
cd my-uniapp
# 安装依赖
npm install
# 运行开发服务器
npm run dev:h5 # H5
npm run dev:mp-weixin # 微信小程序
npm run dev:app # Android/iOS
# 项目构建
npm run build:h5
npm run build:mp-weixin
npm run build:app3.4 安装 Sass 支持
npm install sass sass-loader -D4. 项目创建与运行
4.1 创建第一个页面
pages/index/index.vue
<template>
<view class="container">
<view class="title">欢迎使用 UniApp</view>
<view class="content">
<text>{{ message }}</text>
</view>
<button @click="handleClick">点击我</button>
</view>
</template>
<script setup>
import { ref } from 'vue'
// 定义响应式数据
const message = ref('Hello UniApp!')
// 方法定义
const handleClick = () => {
message.value = '你点击了按钮!'
uni.showToast({
title: '点击成功',
icon: 'success'
})
}
// 页面加载时触发
onLoad(() => {
console.log('页面加载')
})
</script>
<style lang="scss" scoped>
.container {
padding: 40rpx;
text-align: center;
}
.title {
font-size: 48rpx;
font-weight: bold;
color: #333;
margin-bottom: 40rpx;
}
.content {
font-size: 32rpx;
color: #666;
margin-bottom: 40rpx;
}
</style>4.2 运行项目
# H5 模式运行
npm run dev:h5
# 访问 http://localhost:5173

# 微信小程序模式运行
npm run dev:mp-weixin
# 使用微信开发者工具打开 dist/dev/mp-weixin 目录
4.3 微信开发者工具配置
- 下载并安装 微信开发者工具
- 设置 → 安全设置 → 开启服务端口
- HBuilderX 运行 → 运行到小程序模拟器 → 微信开发者工具
5. 页面与路由
5.1 页面跳转
声明式导航(navigator 组件)
<!-- 跳转普通页面 -->
<navigator url="/pages/detail/detail?id=1&name=test">
  <button>跳转详情页</button>
</navigator>

<!-- 跳转 TabBar 页面 -->
<navigator url="/pages/index/index" open-type="switchTab">
  <button>跳转到首页</button>
</navigator>

<!-- 跳转并返回 -->
<navigator url="/pages/detail/detail" open-type="navigateBack">
  <button>返回上一页</button>
</navigator>
编程式导航(uni API)
// 跳转到普通页面
uni.navigateTo({
  url: '/pages/detail/detail?id=1&name=test'
})

// 跳转到 TabBar 页面
uni.switchTab({
  url: '/pages/index/index'
})

// 页面返回
uni.navigateBack({
  delta: 1  // 返回的页面数
})

// 关闭当前页面跳转
uni.redirectTo({
  url: '/pages/detail/detail'
})

// 关闭所有页面跳转(谨慎使用)
uni.reLaunch({
  url: '/pages/index/index'
})

// 预加载页面
uni.preloadPage({
  url: '/pages/detail/detail'
})
5.2 获取页面参数
// 在目标页面获取参数
onLoad((options) => {
  console.log('页面参数:', options)
  // { id: "1", name: "test" }
})
5.3 路由守卫
// main.js 中设置
const router = uni.createRouter({
  routes: [
    {
      path: '/pages/index/index',
      aliasPath: '/',
      name: 'index'
    }
  ]
})

// 全局前置守卫
router.beforeEach((to, from, next) => {
  // 检查登录状态
  const token = uni.getStorageSync('token')
  if (to.path !== '/pages/login/login' && !token) {
    next('/pages/login/login')
  } else {
    next()
  }
})

export default router
6. 组件开发
6.1 组件创建
components/my-header/my-header.vue
<template>
  <view class="header" :style="{ backgroundColor: bgColor }">
    <view class="header-left" @click="handleBack" v-if="showBack">
      <text class="icon">←</text>
    </view>
    <view class="header-title">
      <text>{{ title }}</text>
    </view>
    <view class="header-right">
      <slot name="right"></slot>
    </view>
  </view>
</template>

<script setup>
defineProps({
  title: {
    type: String,
    default: '标题'
  },
  bgColor: {
    type: String,
    default: '#ffffff'
  },
  showBack: {
    type: Boolean,
    default: true
  }
})

const emit = defineEmits(['back'])

const handleBack = () => {
  emit('back')
  uni.navigateBack()
}
</script>

<style lang="scss" scoped>
.header {
  display: flex;
  align-items: center;
  height: 88rpx;
  padding: 0 24rpx;
}

.header-left,
.header-right {
  width: 80rpx;
}

.header-title {
  flex: 1;
  text-align: center;
  font-size: 34rpx;
  font-weight: 500;
}

.icon {
  font-size: 40rpx;
}
</style>
6.2 组件使用
<template>
  <view>
    <my-header title="详情页" @back="onBack">
      <template #right>
        <text class="share">分享</text>
      </template>
    </my-header>
  </view>
</template>

<script setup>
import MyHeader from '@/components/my-header/my-header.vue'

const onBack = () => {
  console.log('返回上一页')
}
</script>
6.3 组件通信
Props 父传子
// 子组件定义 props
defineProps({
  title: String,
  list: {
    type: Array,
    default: () => []
  }
})

// 父组件传值
<child-component title="标题" :list="dataList" />
Emit 子传父
// 子组件触发事件
const emit = defineEmits(['update', 'delete'])
emit('update', newValue)
emit('delete', itemId)

// 父组件监听
<child-component @update="onUpdate" @delete="onDelete" />
Ref 获取组件实例
// 父组件
const childRef = ref(null)

onMounted(() => {
  childRef.value.someMethod()
})

// 子组件暴露方法
defineExpose({
  someMethod() {
    console.log('暴露的方法')
  }
})
6.4 uni-ui 组件库
# 安装 uni-ui
npm install @dcloudio/uni-ui

# 或在 HBuilderX 中直接使用
使用示例
<template>
  <view>
    <!-- 按钮 -->
    <uni-button type="primary" @click="handleClick">
      主按钮
    </uni-button>

    <!-- 卡片 -->
    <uni-card title="卡片标题" thumbnail="/static/logo.png">
      <text>卡片内容</text>
    </uni-card>

    <!-- 搜索栏 -->
    <uni-search-bar
      v-model="searchValue"
      placeholder="搜索"
      @confirm="onSearch"
    />

    <!-- 列表 -->
    <uni-list>
      <uni-list-item title="列表项1" />
      <uni-list-item title="列表项2" />
    </uni-list>
  </view>
</template>

<script setup>
import { ref } from 'vue'
import {
  UniButton,
  UniCard,
  UniSearchBar,
  UniList,
  UniListItem
} from '@dcloudio/uni-ui'

const searchValue = ref('')

const handleClick = () => {
  uni.showToast({ title: '点击' })
}

const onSearch = () => {
  console.log('搜索:', searchValue.value)
}
</script>
7. 样式与布局
7.1 尺寸单位
| 单位 | 说明 | 转换规则 |
|---|---|---|
px | 屏幕像素 | 固定值 |
rpx | 响应式像素 | 屏幕宽度 / 750 |
vh | 视口高度 | CSS 标准 |
% | 百分比 | 相对父元素 |
rpx 使用建议
// 页面全宽
width: 750rpx;

// 页面半宽
width: 375rpx;

// 元素间距
padding: 20rpx;
margin: 30rpx;

// 字体大小
font-size: 28rpx;
7.2 Flex 布局
<template>
  <view class="flex-container">
    <!-- 水平排列 -->
    <view class="flex-row">
      <view class="item">1</view>
      <view class="item">2</view>
      <view class="item">3</view>
    </view>

    <!-- 垂直排列 -->
    <view class="flex-column">
      <view class="item">1</view>
      <view class="item">2</view>
      <view class="item">3</view>
    </view>
  </view>
</template>

<style lang="scss" scoped">
// 水平居中
.flex-row {
  display: flex;
  justify-content: center;
  align-items: center;
}

// 两端对齐
.flex-between {
  display: flex;
  justify-content: space-between;
}

// 换行
.flex-wrap {
  display: flex;
  flex-wrap: wrap;
}

// 垂直列
.flex-column {
  display: flex;
  flex-direction: column;
}
</style>
7.3 全局样式变量 (uni.scss)
// uni.scss
// 主题色
$primary-color: #007aff;
$success-color: #4cd964;
$warning-color: #f0ad4e;
$error-color: #dd524d;

// 文字色
$text-color: #333333;
$text-color-inverse: #ffffff;
$text-color-grey: #999999;
$text-color-placeholder: #cccccc;

// 背景色
$bg-color: #f5f5f5;
$bg-color-grey: #eeeeee;

// 间距
$spacing-sm: 16rpx;
$spacing-md: 24rpx;
$spacing-lg: 32rpx;

// 圆角
$border-radius-sm: 8rpx;
$border-radius-md: 16rpx;
$border-radius-lg: 24rpx;

// 字体大小
$font-size-xs: 20rpx;
$font-size-sm: 24rpx;
$font-size-base: 28rpx;
$font-size-lg: 32rpx;
$font-size-xl: 36rpx;
7.4 条件编译样式
/* #ifdef H5 */
.header {
  height: 60px;
  line-height: 60px;
}
/* #endif */

/* #ifdef MP-WEIXIN */
.header {
  height: 88rpx;
  line-height: 88rpx;
}
/* #endif */

/* #ifdef APP-PLUS */
.header {
  padding-top: 20px;
}
/* #endif */
8. 生命周期
8.1 应用生命周期
// App.vue
<script setup>
import { onLaunch, onShow, onHide, onError, onPageNotFound } from 'vue'

// 应用初始化完成
onLaunch(() => {
  console.log('App Launch')
  // 检查更新
  checkUpdate()
})

// 应用显示
onShow(() => {
  console.log('App Show')
  // 获取分享信息
})

// 应用隐藏
onHide(() => {
  console.log('App Hide')
  // 保存状态
})

// 报错监听
onError((err) => {
  console.error('App Error:', err)
  // 上报错误
})

// 页面不存在
onPageNotFound((res) => {
  console.log('Page Not Found:', res.path)
  // 跳转 404 页面
})
</script>
8.2 页面生命周期
<script setup>
import {
  onLoad,        // 监听页面加载
  onShow,        // 监听页面显示
  onReady,       // 监听页面初次渲染完成
  onHide,        // 监听页面隐藏
  onUnload,      // 监听页面卸载
  onPullDownRefresh,    // 监听下拉刷新
  onReachBottom,        // 监听上拉加载
  onPageScroll,         // 监听页面滚动
  onShareAppMessage,    // 监听用户点击右上角转发
  onShareTimeline       // 监听右上角分享到朋友圈
} from 'vue'

// 页面加载
onLoad((options) => {
  console.log('页面参数:', options)
  getData(options.id)
})

// 页面显示
onShow(() => {
  console.log('页面显示')
})

// 页面初次渲染完成
onReady(() => {
  console.log('页面渲染完成')
  // 可以开始使用 Canvas 等
})

// 页面隐藏
onHide(() => {
  console.log('页面隐藏')
})

// 页面卸载
onUnload(() => {
  console.log('页面卸载')
})

// 下拉刷新
onPullDownRefresh(() => {
  getData().then(() => {
    uni.stopPullDownRefresh()
  })
})

// 上拉加载
onReachBottom(() => {
  loadMore()
})

// 页面滚动
onPageScroll((e) => {
  console.log('滚动距离:', e.scrollTop)
})

// 分享给朋友
onShareAppMessage(() => {
  return {
    title: '分享标题',
    path: '/pages/index/index',
    imageUrl: '/static/share.png'
  }
})

// 分享到朋友圈
onShareTimeline(() => {
  return {
    title: '分享标题',
    query: 'from=share',
    imageUrl: '/static/share.png'
  }
})
</script>
8.3 组件生命周期
<script setup>
import {
  onMounted,
  onUpdated,
  onUnmounted,
  onBeforeMount,
  onBeforeUpdate,
  onBeforeUnmount
} from 'vue'

// 组件即将挂载
onBeforeMount(() => {
  console.log('Before Mount')
})

// 组件挂载完成
onMounted(() => {
  console.log('Mounted')
  // 获取 DOM
})

// 组件即将更新
onBeforeUpdate(() => {
  console.log('Before Update')
})

// 组件更新完成
onUpdated(() => {
  console.log('Updated')
})

// 组件即将卸载
onBeforeUnmount(() => {
  console.log('Before Unmount')
})

// 组件卸载完成
onUnmounted(() => {
  console.log('Unmounted')
})
</script>
9. 状态管理
9.1 Pinia 状态管理
# 安装 Pinia
npm install pinia
store/index.js
import { createPinia } from 'pinia'

const pinia = createPinia()

export default pinia
store/user.js
import { defineStore } from 'pinia'
import { ref, computed } from 'vue'

export const useUserStore = defineStore('user', () => {
  // 状态
  const userInfo = ref(null)
  const token = ref('')
  const isLogin = computed(() => !!token.value)

  // 方法
  const setUserInfo = (info) => {
    userInfo.value = info
    uni.setStorageSync('userInfo', info)
  }

  const setToken = (newToken) => {
    token.value = newToken
    uni.setStorageSync('token', newToken)
  }

  const login = async (username, password) => {
    const res = await uni.request({
      url: '/api/login',
      method: 'POST',
      data: { username, password }
    })
    if (res.code === 0) {
      setToken(res.data.token)
      setUserInfo(res.data.userInfo)
      return true
    }
    return false
  }

  const logout = () => {
    userInfo.value = null
    token.value = ''
    uni.removeStorageSync('token')
    uni.removeStorageSync('userInfo')
  }

  // 初始化
  const init = () => {
    token.value = uni.getStorageSync('token') || ''
    userInfo.value = uni.getStorageSync('userInfo') || null
  }

  return {
    userInfo,
    token,
    isLogin,
    setUserInfo,
    setToken,
    login,
    logout,
    init
  }
})
main.js 引入
import { createSSRApp } from 'vue'
import App from './App.vue'
import pinia from './store'

export function createApp() {
  const app = createSSRApp(App)
  app.use(pinia)
  return { app }
}
组件中使用
<script setup>
import { useUserStore } from '@/store/user'

const userStore = useUserStore()

// 登录
const handleLogin = async () => {
  const success = await userStore.login('user', 'pass')
  if (success) {
    uni.showToast({ title: '登录成功' })
  }
}

// 退出登录
const handleLogout = () => {
  userStore.logout()
  uni.reLaunch({ url: '/pages/login/login' })
}
</script>

<template>
  <view>
    <text v-if="userStore.isLogin">
      欢迎,{{ userStore.userInfo?.name }}
    </text>
    <text v-else>未登录</text>
  </view>
</template>
9.2 全局状态共享
// mixins/global.js
import { useUserStore } from '@/store/user'

export const globalMixin = {
  computed: {
    isLogin() {
      const userStore = useUserStore()
      return userStore.isLogin
    },
    userInfo() {
      const userStore = useUserStore()
      return userStore.userInfo
    }
  }
}
10. 接口与云函数
10.1 请求封装 (utils/request.js)
// utils/request.js

// 创建请求实例
const request = (options) => {
  return new Promise((resolve, reject) => {
    const baseURL = import.meta.env.VITE_API_BASE_URL || 'http://localhost:3000'

    uni.request({
      url: baseURL + options.url,
      method: options.method || 'GET',
      data: options.data || {},
      header: {
        'Content-Type': 'application/json',
        'Authorization': uni.getStorageSync('token') || '',
        ...options.header
      },
      timeout: 30000,
      success: (res) => {
        if (res.statusCode === 200) {
          if (res.data.code === 0) {
            resolve(res.data.data)
          } else {
            uni.showToast({
              title: res.data.message || '请求失败',
              icon: 'none'
            })
            reject(res.data)
          }
        } else if (res.statusCode === 401) {
          // Token 过期,跳转登录
          uni.removeStorageSync('token')
          uni.reLaunch({ url: '/pages/login/login' })
          reject(res)
        } else {
          uni.showToast({
            title: '网络错误',
            icon: 'none'
          })
          reject(res)
        }
      },
      fail: (err) => {
        uni.showToast({
          title: '网络请求失败',
          icon: 'none'
        })
        reject(err)
      }
    })
  })
}

// 导出常用方法
export const get = (url, data, header) =>
  request({ url, method: 'GET', data, header })

export const post = (url, data, header) =>
  request({ url, method: 'POST', data, header })

export const put = (url, data, header) =>
  request({ url, method: 'PUT', data, header })

export const del = (url, data, header) =>
  request({ url, method: 'DELETE', data, header })

export default request
10.2 API 接口管理 (api/user.js)
import { get, post } from '@/utils/request'

// 获取用户信息
export const getUserInfo = () => get('/api/user/info')

// 用户登录
export const login = (data) => post('/api/user/login', data)

// 用户注册
export const register = (data) => post('/api/user/register', data)

// 更新用户信息
export const updateUserInfo = (data) => post('/api/user/update', data)
10.3 云函数
云函数目录结构
cloudfunctions/
├── getUserInfo/
│   ├── index.js
│   └── package.json
└── login/
    ├── index.js
    └── package.json
云函数代码 (getUserInfo/index.js)
// 云函数入口文件
const cloud = require('wx-server-sdk')

cloud.init({
  env: cloud.DYNAMIC_CURRENT_ENV
})

const db = cloud.database()

// 云函数入口函数
exports.main = async (event, context) => {
  const { userId } = event

  try {
    // 查询用户信息
    const res = await db.collection('users')
      .doc(userId)
      .get()

    return {
      success: true,
      data: res.data
    }
  } catch (e) {
    return {
      success: false,
      message: e.message
    }
  }
}
调用云函数
// 调用云函数
uni.cloud.callFunction({
  name: 'getUserInfo',
  data: {
    userId: 'xxx'
  },
  success: (res) => {
    console.log('云函数返回:', res.result)
  },
  fail: (err) => {
    console.error('调用失败:', err)
  }
})
10.4 云数据库
// 获取数据库引用
const db = wx.cloud.database()

// 查询数据
const result = await db.collection('todos')
  .where({
    done: false
  })
  .orderBy('createTime', 'desc')
  .skip(0)
  .limit(10)
  .get()

// 添加数据
await db.collection('todos').add({
  data: {
    title: '学习 UniApp',
    done: false,
    createTime: db.serverDate()
  }
})

// 更新数据
await db.collection('todos')
  .doc('todo-id')
  .update({
    data: {
      done: true,
      updateTime: db.serverDate()
    }
  })

// 删除数据
await db.collection('todos')
  .doc('todo-id')
  .remove()
11. 条件编译
11.1 条件编译语法
// #ifdef 平台标识
// 代码仅在指定平台编译
// #endif

// #ifndef 平台标识
// 代码在除指定平台外的平台编译
// #endif
11.2 平台标识
| 平台标识 | 说明 |
|---|---|
H5 | H5 平台 |
MP-WEIXIN | 微信小程序 |
MP-ALIPAY | 支付宝小程序 |
MP-BAIDU | 百度小程序 |
MP-TOUTIAO | 抖音小程序 |
MP-QQ | QQ 小程序 |
APP-PLUS | App 平台 |
APP-NVUE | NVUE 平台 |
11.3 使用示例
组件条件编译
<template>
  <view>
    <!-- 微信小程序显示客服 -->
    <!-- #ifdef MP-WEIXIN -->
    <button open-type="contact">客服</button>
    <!-- #endif -->

    <!-- App 显示原生导航 -->
    <!-- #ifdef APP-PLUS -->
    <view class="native-nav">原生导航</view>
    <!-- #endif -->

    <!-- H5 显示特殊处理 -->
    <!-- #ifdef H5 -->
    <view class="h5-special">H5 专属样式</view>
    <!-- #endif -->
  </view>
</template>
JS 条件编译
// #ifdef MP-WEIXIN
wx.login({
  success: (res) => {
    console.log('微信登录:', res.code)
  }
})
// #endif

// #ifdef APP-PLUS
uni.login({
  provider: 'weixin',
  success: (res) => {
    console.log('App 微信登录:', res.authResult)
  }
})
// #endif

// #ifdef H5
// H5 扫码登录逻辑
// #endif
样式条件编译
.container {
  padding: 20rpx;

  // 小程序特有样式
  // #ifdef MP-WEIXIN
  padding-bottom: calc(20rpx + env(safe-area-inset-bottom));
  // #endif

  // App 特有样式
  // #ifdef APP-PLUS
  padding-top: 40rpx;
  // #endif
}
12. 打包与发布
12.1 微信小程序发布
# 1. 运行构建
npm run build:mp-weixin

# 2. 打开 dist/build/mp-weixin 目录
# 3. 使用微信开发者工具导入
# 4. 在开发者工具中上传代码
# 5. 登录微信公众平台提交审核
12.2 App 打包
Android 应用打包
# 1. 修改 manifest.json 配置
# 2. 运行打包命令
npm run build:app

# 3. 在 HBuilderX 中
#    - 选择 "发行" → "原生 App-云打包"
#    - 选择 Android 证书
#    - 等待打包完成
iOS 应用打包
# 需要 macOS + HBuilderX
# 1. 配置 Apple 开发者证书
# 2. 发行 → 原生 App-云打包
# 3. 选择 iOS
# 4. 使用云打包或本地离线打包
12.3 H5 部署
# 1. 构建 H5 版本
npm run build:h5

# 2. 生成的 dist/build/h5 目录即为静态资源
# 3. 部署到服务器
#    - Nginx 配置
#    - Vercel / Netlify 部署
#    - 阿里云 OSS
Nginx 配置示例
server {
    listen 80;
    server_name your-domain.com;
    root /path/to/dist/build/h5;
    index index.html;

    location / {
        try_files $uri $uri/ /index.html;
    }

    # SPA 路由支持
    location /api {
        proxy_pass http://backend-server;
    }
}
12.4 App Store 发布注意事项
{
  "app-plus": {
    "distribute": {
      "ios": {
        "dSYMs": true,
        "idfa": false
      },
      "android": {
        "permissions": [
          "<uses-permission android:name=\"android.permission.INTERNET\"/>",
          "<uses-permission android:name=\"android.permission.ACCESS_NETWORK_STATE\"/>"
        ]
      }
    }
  }
}
13. 实战技巧与最佳实践
13.1 性能优化
1. 列表渲染优化
<!-- 使用 v-show 代替 v-if -->
<view v-show="showList">
  <view v-for="item in list" :key="item.id">
    {{ item.name }}
  </view>
</view>

<!-- 长列表使用虚拟列表 -->
<!-- 参考 uView 的虚拟列表组件 -->
2. 图片优化
<!-- 使用懒加载 -->
<image
  :src="item.thumb"
  mode="aspectFill"
  lazy-load
/>

<!-- 条件编译图片资源 -->
<!-- #ifdef MP-WEIXIN -->
<img src="/static/weixin-logo.png" />
<!-- #endif -->
<!-- #ifdef H5 -->
<img src="/static/h5-logo.png" />
<!-- #endif -->
3. 事件处理优化
// 事件节流
let lastTime = 0
const handleScroll = () => {
  const now = Date.now()
  if (now - lastTime > 100) {
    lastTime = now
    // 处理滚动逻辑
  }
}

// 函数防抖
import { debounce } from 'lodash-es'
const handleInput = debounce((value) => {
  console.log('搜索:', value)
}, 300)
13.2 登录鉴权
// router.js
const whiteList = ['/pages/login/login', '/pages/register/register']

router.beforeEach((to, from, next) => {
  const hasToken = uni.getStorageSync('token')

  if (hasToken) {
    if (to.path === '/pages/login/login') {
      next('/pages/index/index')
    } else {
      next()
    }
  } else {
    if (whiteList.includes(to.path)) {
      next()
    } else {
      uni.showToast({
        title: '请先登录',
        icon: 'none'
      })
      setTimeout(() => {
        uni.reLaunch({ url: '/pages/login/login' })
      }, 1000)
    }
  }
})
13.3 错误处理
// 全局错误处理
const errorHandler = (error, vm, info) => {
  console.error('全局错误:', error)
  console.error('错误信息:', info)

  // 上报错误
  reportError({
    error: error.toString(),
    info,
    time: new Date().toISOString()
  })
}

// 注册全局错误处理器
app.config.errorHandler = errorHandler

// Promise 未处理错误
app.config.onUnhandledRejection = (res) => {
  console.error('未处理的 Promise 错误:', res)
}
13.4 常用工具函数
// utils/index.js

// 防抖
export const debounce = (fn, delay = 300) => {
  let timer = null
  return function (...args) {
    if (timer) clearTimeout(timer)
    timer = setTimeout(() => {
      fn.apply(this, args)
    }, delay)
  }
}

// 节流
export const throttle = (fn, delay = 300) => {
  let lastTime = 0
  return function (...args) {
    const now = Date.now()
    if (now - lastTime > delay) {
      lastTime = now
      fn.apply(this, args)
    }
  }
}

// 格式化日期
export const formatDate = (date, format = 'YYYY-MM-DD') => {
  const d = new Date(date)
  const year = d.getFullYear()
  const month = String(d.getMonth() + 1).padStart(2, '0')
  const day = String(d.getDate()).padStart(2, '0')
  const hours = String(d.getHours()).padStart(2, '0')
  const minutes = String(d.getMinutes()).padStart(2, '0')
  const seconds = String(d.getSeconds()).padStart(2, '0')

  return format
    .replace('YYYY', year)
    .replace('MM', month)
    .replace('DD', day)
    .replace('HH', hours)
    .replace('mm', minutes)
    .replace('ss', seconds)
}

// 深拷贝
export const deepClone = (obj) => {
  return JSON.parse(JSON.stringify(obj))
}

// 生成唯一 ID
export const generateId = () => {
  return Date.now().toString(36) + Math.random().toString(36).substr(2)
}
附录:常用命令
| 命令 | 说明 |
|---|---|
npm run dev:h5 | 开发 H5 |
npm run dev:mp-weixin | 开发微信小程序 |
npm run dev:app | 开发 App |
npm run build:h5 | 构建 H5 |
npm run build:mp-weixin | 构建微信小程序 |
npm run build:app | 构建 App |
附录:常用插件推荐
| 插件 | 说明 |
|---|---|
uView | 多平台快速开发 UI 框架 |
uni-ui | DCloud 官方 UI 组件库 |
uni-request | Promise 化请求库 |
pinia | Vue 3 状态管理 |
lodash-es | JavaScript 工具库 |
参考资源
💡 提示:UniApp 生态丰富,建议多参考官方文档和社区资源!
🔥 实战建议:从小程序端开始开发,完成后再扩展到 App 和 H5
© 版权声明
文章版权归作者所有,未经允许请勿转载。
THE END


暂无评论内容